Shelter
It’s an instinct for even the most urbanised child to prop sticks together to create some kind of den or hut when in a woodland. A part of our most primitive brain urges us to make a home in the woods - a protective shell against wind, dark and the eyes of predators. In my sessions, it has been among the most sought after activities. What children build is often far from fit for purpose as an actual ‘shelter’, and having a tarpaulin to put up against actual inclement weather is not just practical, but a fun and educational way to get children thinking about shelter in a real sense - something that in your scenario, should be quick to erect and take down, and which makes room for everyone to huddle against the rain.
As a Forest School leader, you will want to let child participants have the freedom to experiment with shelter-building independently before stepping in to offer guidance; with a bushcraft instructor hat firmly on, however, you will find that at some point, many children will welcome a little help in learning some basic structures and techniques that will let them build more successfully, resulting in the kind of shelter they imagined being able to build.
Group shelter purposes, health and safety
Temporary group shelters can be a fun and useful skill-building and teamwork-building exercise, and it can provide practical site development, allowing for comfort and enjoyment in a range of weather conditions. Once they have been taught the basics of how a shelter might be erected (beyond the instinctual stick tepees children typically try to make) they can be largely self-sufficient in carrying it out. Adult supervision with regard to health and safety will focus primarily on:
· Unacceptable horseplay with sticks/fighting
· Safe drag and carry
· Checking that load-bearing shelter elements (i.e. stabilised main branches or poles, knots of ropes) are well positioned and fit for purpose to avoid collapse
· Being aware of and guide clients around especial eye-poke hazards or similar.
· Being on the lookout for hazards uncovered by clients moving materials (i.e. broken glass in the leaf litter)
Weather conditions
Poor weather can make shelter building feel all the more ‘real’ for clients. Rain brings the lesson of how to properly rain-proof a shelter, rather than ‘pretend’ protection. Wind will quickly find out a shelter’s weakenesses. A temporary group shelter made with a tarpaulin by the FS Leader can provide a meeting place, warm-up, craft site, etc. in wet weather, extending outdoor activity somewhat in inclement weather. However, a temporary shelter is no answer to high winds, thunder and lightning, or cold which is a danger to safety. If the weather presents hazards like these, it is best not to enter the woods at all, and to make indoor arrangements for that session.
Ecological considerations
For sustainable use of the site over a long time, natural shelters in this section will use dead wood only, available from windfalls or forest management activities and piled aside for purpose, natural debris of the forest floor/collected leaf matter, and ropes/cords that can be easily removed at the end of the session.
Where possible, site the shelter on less sensitive ground where trampling will make less of an impact. Collecting leaf matter can disturb the habitats of small animals and insects. If this is a concern, a tarpaulin makes a good alternative to using leaf matter to cover a shelter.
Dismantle and scatter materials at the end of the session to restore the natural look of the site and habitat for wildlife.
GROUP SHELTER 1: THE ARCH SHELTER (With tarpaulin)
You will need:
· 1 tarpaulin
· Hazel (or other) poles, long, either growing in situ or provided by FS Leader
· Pegs or stakes (craft opportunity)
· Cordage

1. Locate your shelter where there are some bendy shrub-layer plants such as hazel, willow, elder or ash. If none are placed fit for purpose, bendy poles of the same can be fixed into the soil by a few inches a suitable distance apart and then bent together, or one very long one fixed at both ends into the ground, or tied to nearby trees.
2. Using one long or two bent towards each other, use a ROUND TURN HITCH or SQUARE KNOT, to secure the poles in place, joining them together to form an arch.
3. Spread the tarpaulin over the arch/frame and position so that one edge of the tarpaulin follows the curve of the arch.
4. Fix the tarpaulin at the foot of each side of the arch either by tying it in place around the arch poles, or by staking it out.
5. Pull the tarpaulin back and stake out its back corners, plus one in the middle if there is a grommet that will allow a middle peg to be used.
6. For added stability, tie a length of cord (BOWLINE works well) around the arch pole and stake it out on the far side of the shelter.
7. To increase interior space, a central pole may be used to tent out the middle of the tarpaulin (see photo)
8. Adjust as necessary.
GROUP SHELTER 2: THE LEAN-TO (Natural or with tarpaulin)
You will need:
· Natural materials, primarily long poles, branches, and leaf matter (or a tarpaulin)

· Strong paracord or rope
· As many helpers as possible
1. Select two trees a distance apart that is just less than the long pole you intend to use as a ridge pole.
2. Secure the ridge pole in place – horizontally - using cordage and WRAPS & FRAPS at both ends around the two support trees. For added stability, a support pole can be wedged in place underneath the ridge pole where it crossed each tree, to hold it against the tree. NOTE: Check the length of the poles you will use to form the slanted back of the shelter, They need to be angled out to provide interior space, so use these to gauge how far off the ground your ridge pole should be placed.
3. An adult should check the stability of the ridge pole at this point.
4. Begin leaning poles against the ridge pole at an angle to form the back. The more you have, the more stable it will be.
5. Use smaller branches to criss-cross the back, creating a lattice that your leaf matter can cling to. NOTE: This step not needed where a tarpaulin is to be used.
6. Pile leaf matter (or secure a tarpaulin) across the back for insulation and weatherproofing.
7. OPTIONAL: Fill in the sides of the angle to provided greater shelter.
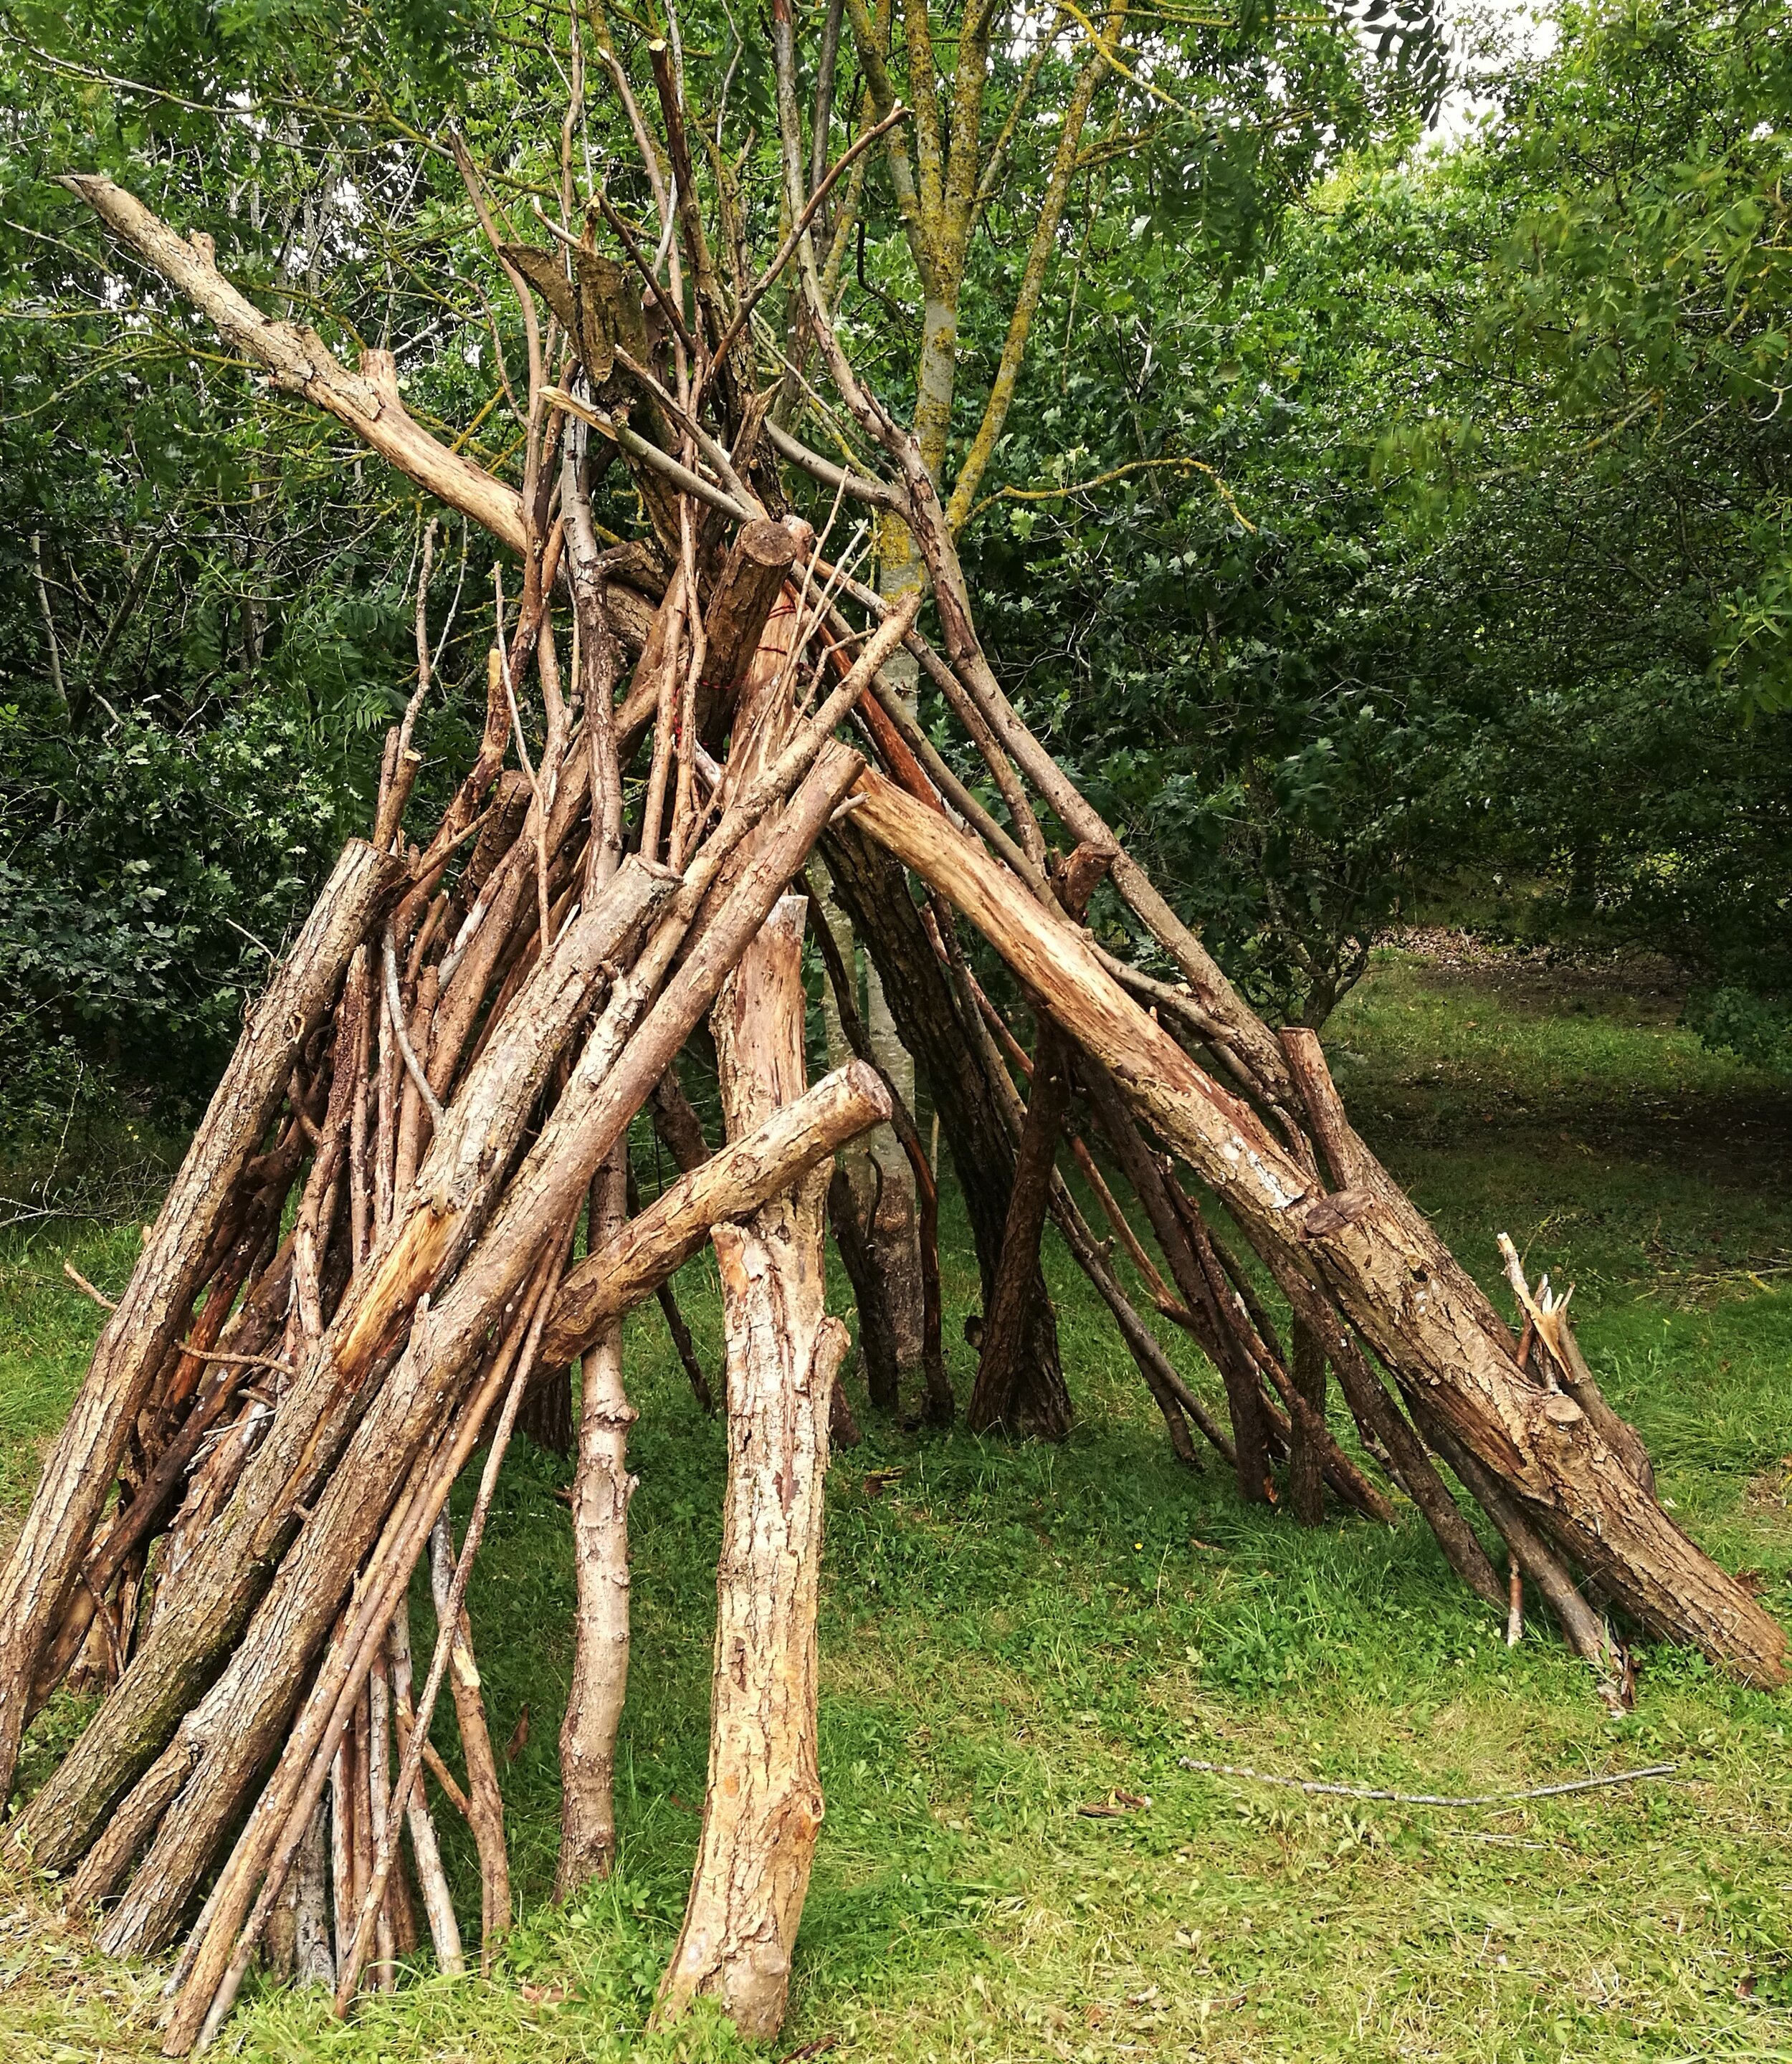
SINGLE SHELTER 1: TOM BROWN’S DEBRIS SHELTER (NATURAL)
You will need:
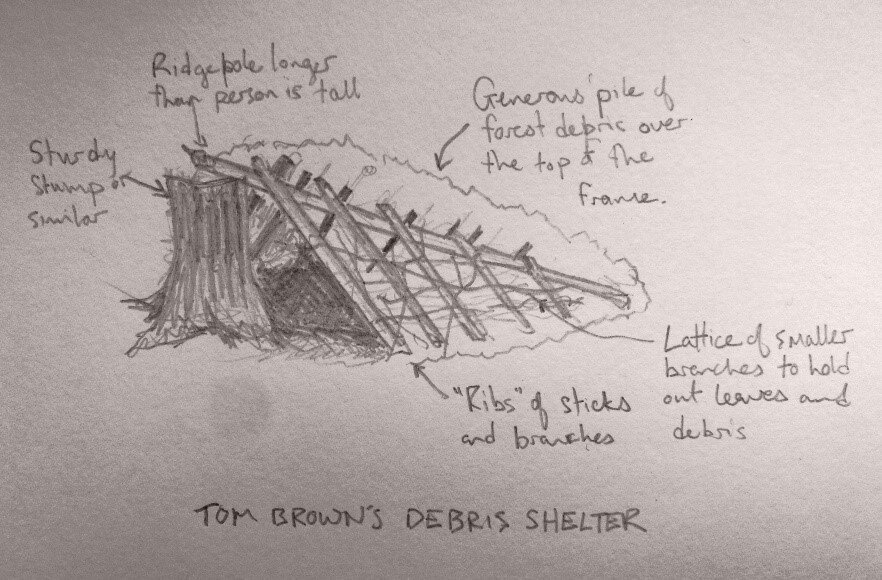
· A stump, rock, cleft in a tree or other anchor point between knee and chest high
· A ridge pole longer than the height of the person using the shelter
· Sticks and branches
· Leaf matter (debris)
1. Place the ridge pole against the anchor point.
2. Lean sticks and branches against it, either side, until a tent-shape is formed.
3. Create a lattice of smaller sticks and branches over the main poles.
4. Pile as much leaf matter as possible onto the frame.
5. Line the shelter with more leaves, grasses, or a tarp or foam mat for insulation off the ground.